


Four Easy Steps to a Beautiful Door
Suggested Supplies
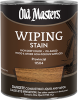
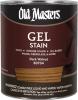
Gel Stain
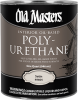
Interior or exterior clear finish
Mineral spirits
2” natural bristle brush
2” foam brush
Latex gloves
Clean, lint-free cloth (for removing excess stain)
Stir stick
- Phillips screwdriver
- Masking tape and paper
- Hammer
- Saw horses (padded)
- Extra cleaning rags
- Putty knife
- Utility knife
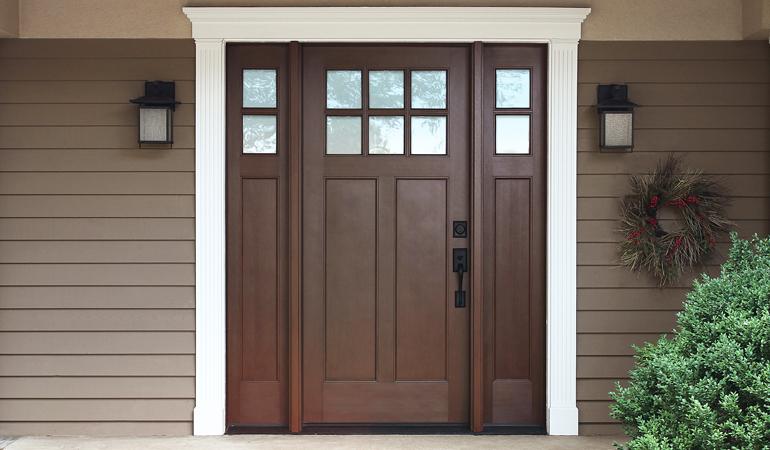
These instructions are designed for use on all fiberglass, carbonite, composition, and other simulated wood grain surfaces, as well as stainable door frames.
A Few Basics
- Thoroughly read and follow all the instructions as printed in this brochure and carefully read through product labels.
- Review suggested supplies on the back page and gather additional supplies.
- Provide a good working environment, one that is free of dust and has adequate lighting and ventilation. Ventilation is important in the application of stains and finishes. Please read product cautions carefully.
- Remove the door from its hinges and place on flat padded saw horses or substitute supports.
- Remove all hardware (hinges, doorknobs, locks, and weather stripping).
Surface Preparation
- Trim or scrape the factory sealant that has seeped out between window trim and the glass, if applicable.
- Mask off any glass and weather stripping that was unable to be removed as well as the doorjamb.
- Using one of your extra cleanup rags, wipe the entire surface with either the provided mineral spirits, or an all purpose cleaner. Wipe clean and allow to dry thoroughly.
Practice
We highly recommend practicing the technique before you attempt to stain the entire door.
- Stir the stain well. Obtain a feel for the staining process by picking a small, flat area on the door to practice.
- Apply stain liberally in this small area with the sponge brush and remove excess stain gradually until the depth of color is satisfactory. When finished practicing, remove the stain in this test area with the provided mineral spirits and extra cleanup rags.
Let’s get started on your project!
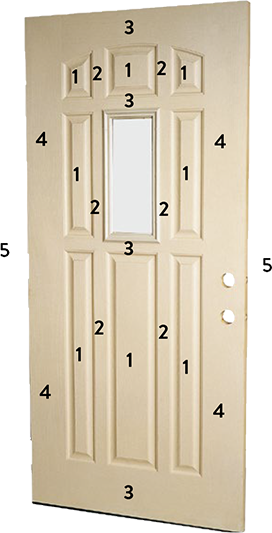 Stain all door panels following the order indicated on this diagram.
- Raised panels and surrounding recessed areas
-
Inside panels (with a vertical grain)
-
Inside panels (with a horizontal grain)
-
Outside panels (with a vertical grain)
-
Outside edges of the door
Note: Door designs may vary from the door illustrated in this diagram. The sequence in staining panels, however, is much the same.
Apply Stain
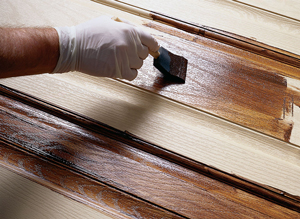
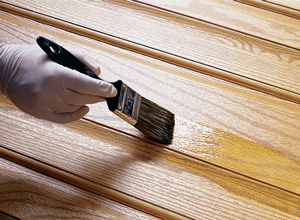
Stir the stain thoroughly to ensure color consistency. Using the 2” foam brush, apply a liberal coat of stain to the panels labeled 1 on “Diagram A.” Be sure to work the stain well into the embossed grain pattern. All corners and crevices of each work area should also be coated.
Complete areas 1, 2 and 3 for each panel before moving on to the next panel as illustrated in “Diagram A.” Remove excess stain around edges of panels with mineral spirits.
Remove Excess Stain
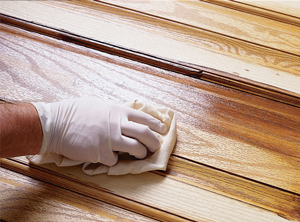 With the cloth provided, remove excess stain from the coated area. Concentrate on wiping
the excess stain from the surface but allow the stain to accentuate the grain that is embossed in the fiberglass.
Remove Streaks or Lap Marks
 Gently brush out streaks or lap marks left behind using the 2” bristle brush.
Dab brush in the corners or crevices to remove any heavy stain accumulations. Occasionally, remove any excess stain from your brush bristles with one of the extra cleanup rags.
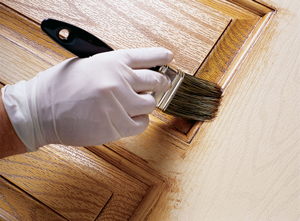
Protect with Polyurethane
 Wait at least eight hours and up to 24 hours or longer depending on
drying conditions before topcoating the stained door. (Refer to the instructions on the back of the polyurethane label.) Using the 2” bristle brush (or equivalent), brush in the direction of the grain. Apply in the same sequence as the stain application.
A minimum of two coats is recommended, waiting six hours between coats. Brushes should be cleaned with mineral spirits.
Should you elect to stain rather than paint the outside of your door, follow steps 1-3. For Step 4, we recommend that you purchase Old Masters Spar-Marine Varnish or Ascend Exterior® to protect exterior surfaces from the elements. These products will provide ultimate protection against sun exposure, water, and weather.
The Gel Stain can also be used to stain the doorjamb, door frame, and mullions. Apply stain with the foam brush and use the 2” bristle brush to soften and blend stain to match the door and trim.
Keep in mind as you are staining that it is better to start light on the stain application. If a darker color is desired, apply a second coat of the stain in the same manner as the first coat. When recoating, allow a minimum of 8-12 hours, depending on drying conditions. Low temperatures and high humidity will increase drying time.
We suggest using mineral spirits to clean up.
DANGER: Rags, steel wool, sanding residue, and other wastes used or soaked with oil-based products may spontaneously catch fire if improperly discarded. No ignition source is required for these wastes to start on fire by themselves. Immediately place rags, steel wool, sanding residue, and other wastes used or soaked with these products in a sealed, water-filled metal container. Dispose of in accordance with local fire regulations.