


Proper topcoat type and application will preserve and protect your project for years after its completion.
Suggested Supplies
- Fine grade sandpaper or nylon sanding pad
- Tack cloth
- Stir stick
- Drop cloth
- Quality, China bristle brush
- Mineral spirits or paint thinner
- Rubber gloves
Selecting the appropriate topcoat and correctly applying it will help to provide lasting, durable protection for the life of your project. A clear topcoat finish will protect surfaces from abrasions, marring, chipping, and damage caused by water and alcohol. Exterior finishes provide superior ultraviolet protection and also help surfaces resist damage caused by water exposure, wind, and weather.
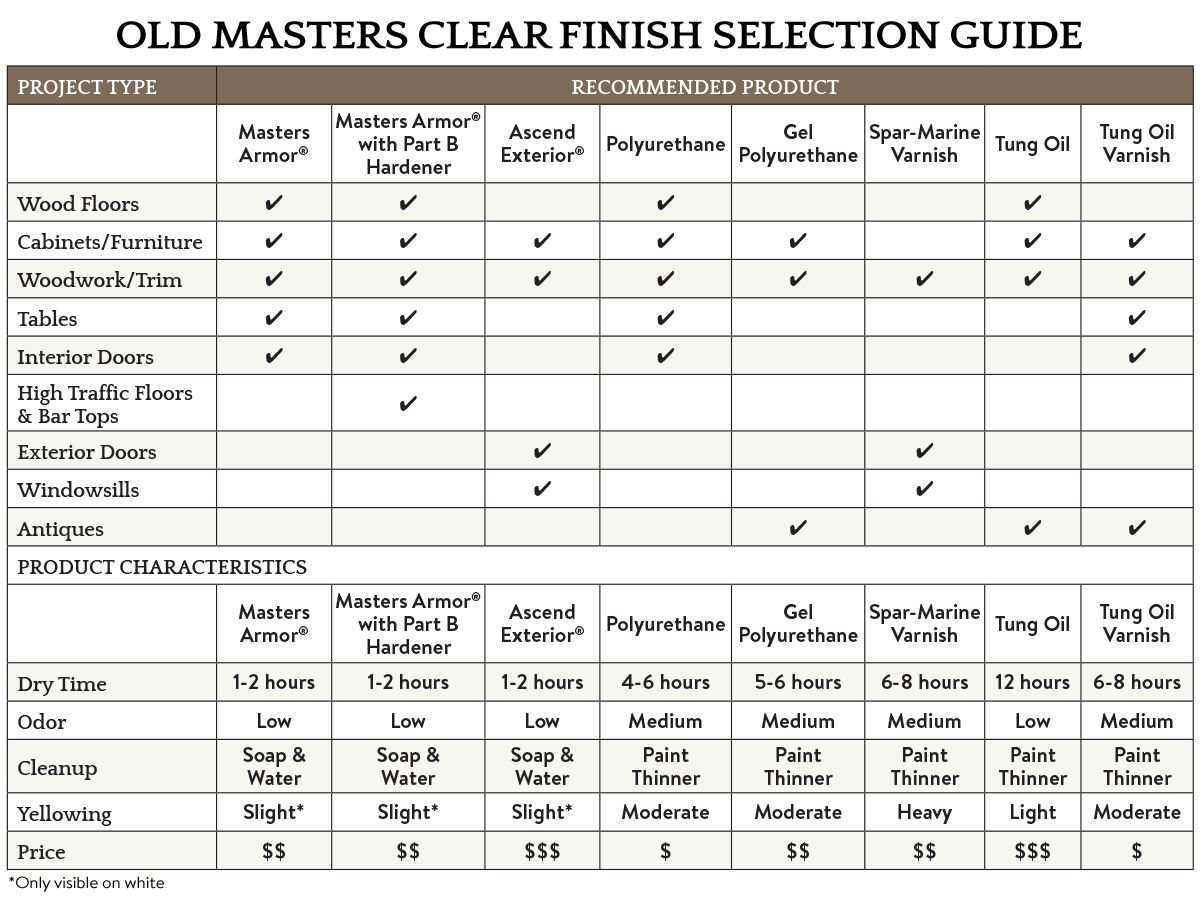
Correct topcoat selection is very important. Each clear finish is uniquely formulated for different applications. For example, Gel Polyurethane is an excellent finish for furniture or antiques but would be a poor finish to use on a floor application. Be sure to read each label carefully, as each one will clearly advise you about suitable applications. Old Masters’ clear finish selection guide below can also assist you in choosing the correct topcoat.
Lastly, remember to sustain the beauty of both interior and exterior surfaces by ensuring the surface is being properly maintained. This is extremely important for outdoor applications as these surfaces are constantly battling Mother Nature’s fury. A good rule of thumb is to reapply exterior clear finishes every two years; however, exterior surfaces that receive extended exposure to the sun may need to be recoated each year.
Masters Armor®
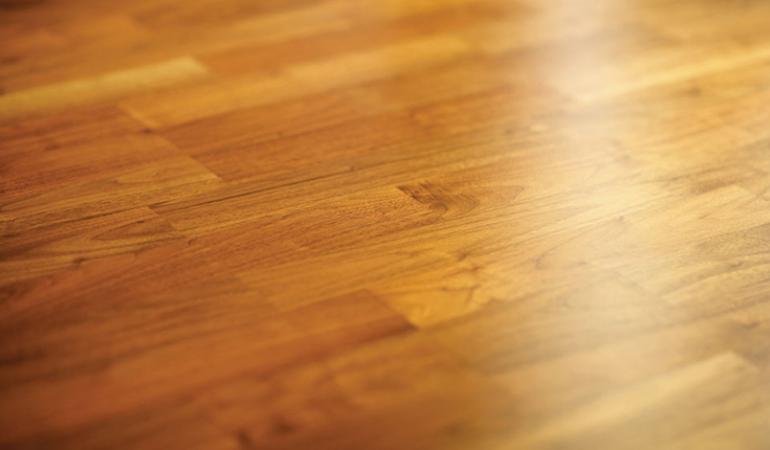
Masters Armor Interior Water-Based Clear Finish will provide a beautiful clear finish using cutting-edge technology. This product will enhance your wood project by being easy to apply and fast drying while providing excellent clarity and superior durability. Masters Armor can be used on floors, cabinets, furniture, or almost any type of woodwork.
Oil-Based Polyurethane
Old Masters Interior Oil-Based Polyurethane is a self- leveling, clear finish designed to protect the beauty of interior surfaces. Easy to apply and quick drying, this polyurethane will provide lasting, durable protection from abrasion, marring, chipping, alcohol, and water. Great for use on interior wood surfaces, such as floors, bars, counters, tabletops, cabinets, wood paneling and doors.
Old-Based Gel Polyurethane
Old Masters Interior Oil-Based Gel Polyurethane is gelled clear finish that produces a soft, hand-rubbed sheen. Its thick formula enables multiple hand-applied coats without drips or brush marks. This product will provide a clear protective finish for a multitude of interior wood surfaces. Not recommended for floors.
Ascend Exterior®
Old Masters Ascend Exterior Water-Based Clear Finish is a durable coating designed for exterior application on wood, fiberglass, coated metal, or painted surfaces. It contains ultraviolet absorbers for advanced sun protection, and dries quickly and cleans easily with soap and water. Use it on properly prepared exterior surfaces, such as railings, outdoor furniture, above waterline marine surfaces, as well as doors (including wood, fiberglass, and steel). It can also be used on interior windowsills and door frames for added ultraviolet protection.
Spar-Marine Varnish
Old Masters Exterior Oil-Based Spar-Marine Varnish is a superior exterior coating formulated to produce a high quality, flexible finish to withstand water and weather. This product can be used on wood, fiberglass, coated metal, or painted surfaces. It also contains ultraviolet absorbers for advanced sun protection. Use on exterior surfaces such as fences, railings, lawn furniture, doors, boats, and marine surfaces. It can also be used on interior windowsills and door frames.
Applying a protective, clear finish is the final step of most staining and finishing projects.
Before you begin, ensure there is adequate ventilation. Clean the surface with a tack rag or damp rag to remove dust. Stir the product thoroughly before and during application. DO NOT SHAKE. For larger projects requiring more than one container, combine containers and mix to ensure gloss uniformity. Test the finish on an inconspicuous part of the surface prior to finishing to ensure adequate adhesion. Do not apply in direct sunlight or areas of extreme air movement. Do not use tack rags when using water-based clear finishes.
Follow these steps when applying a conventional clear finish to properly prepared wood:
- Use a pure China bristle brush to apply. Use a 2” to 2 1⁄2” brush.
- Apply in light, even coats. Avoid thick coats as this may cause drips and wrinkles as the finish dries. Apply in the direction of the grain. Flow on with minimum brushing to achieve a glass-like finish and to avoid creating bubbles.
- Allow the finish to dry. Consult the back of the label for drying times, as drying times for various clear finishes will vary.
- Sand lightly between coats with fine sandpaper (220 grit) to produce a finer finish and promote adhesion. If sandpaper gums up, allow more drying time. Remove sanding dust.
- Reapply. Follow label instructions for recoat times. For interior applications, at least two coats are advisable. For exterior applications, at least three coats are recommended. Carefully read the back of the label for detailed information on each particular product.
- Wait 24 hours before subjecting surfaces to light use. Care should be used during the first week after application as the finish is curing to its ultimate hardness. In floor applications, avoid heavy traffic and replacing of furniture for 72 hours after the final coat. When replacing furniture, do not slide. Do not install rugs or clean floors for 7 days
Helpful hints
- An artist’s brush with firm bristles is handy for picking off lint before the finish dries.
- Before finishing, be sure to secure a dust-free work area to keep the finish clean. Due to vapors involved with solvent- based finishes, apply in an area with good ventilation.